In the first post in this series, I chose a picture that might work for a hanjie/nonogram/whatevertheyrecalledtoday puzzle.

From there I use a free image editing program, Paint.Net, to help figure out which cells will be shaded and which will be left unshaded. I'm not going to explain the entire Paint.Net sequence in one sitting. Instead, I just want to share the next step.
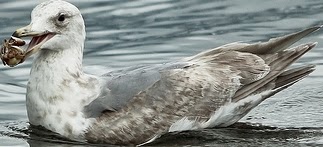
The first thing I want to do with the image is crop it. I want to utilize the entire grid in the puzzle, so I crop the image to include only the subject. With the gull picture, the edges should be the top of the head, the edge of the crab, the end of the wingtips/tail, and the lowest spot in the picture where the gull can be seen over the water.
At first, I just use the selection rectangle and Crop to Selection in Paint.Net to reduce the size to something a little more manageable. I also zoom in to get a better look. I keep fine-tuning until I have the crop that I want.
There are a few things that can help the process. For starters, the selection rectangle can be set to different modes. If you zoom in really close (try 400%+), you can select an area to mark the edges of the final crop. In Add (Union) mode, each new selection will keep the selection that you already have in addition to the new area selected. You can add to these edges by lining up new selections with old selections. Working your way to the corners, you can eventually have a proper rectangle selected. From there, you can crop to the selection.
Another tool is changing the canvas size. You can anchor the canvas on any side. By reducing the size, the opposite side is trimmed. You can keep doing this until you reach the desired crop.
Previous: My Hanjie Process I
Next: My Hanjie Process III
No comments:
Post a Comment